Old furniture carries with it a certain charm, but sometimes it needs a facelift to fit into modern aesthetics. Repainting old furniture is a fantastic way to breathe new life into tired pieces, adding personality and style to any space. Whether you’re a seasoned DIY enthusiast or a beginner looking to embark on a furniture makeover journey, this guide will walk you through the steps to transform your beloved relics into stunning focal points.
1. Assessing the Piece
Before diving into repainting, take a close look at the furniture piece. Assess its condition, identifying any cracks, chips, or imperfections that need addressing. Determine the material of the furniture (wood, metal, plastic, etc.) as it will influence the choice of paint and preparation process.
2. Preparation
Proper preparation is key to a successful repaint job. Start by cleaning the furniture thoroughly to remove dust, dirt, and grime accumulated over the years. Use a mild soap solution and a soft cloth or sponge to gently scrub the surface. Allow the furniture to dry completely before proceeding to the next step.
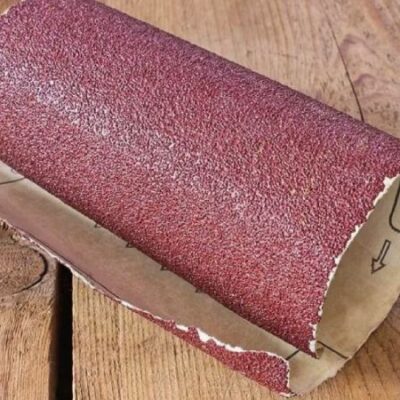
3. Sanding
For wooden furniture, sanding is essential to create a smooth and even surface for the new paint to adhere to. Use fine-grit sandpaper to sand the entire piece, focusing on rough areas and imperfections. Be sure to sand in the direction of the wood grain to avoid creating scratches. Once you’ve achieved a smooth surface, wipe away any dust with a tack cloth.
4. Repairing
If the furniture has any structural damage or loose joints, now is the time to make repairs. Fill in cracks, holes, and dents with wood filler or putty, following the manufacturer’s instructions. For loose joints, apply wood glue and clamp the pieces together until the glue sets. Allow ample time for the repairs to dry before proceeding.
5. Priming
Priming is crucial for ensuring proper paint adhesion and achieving a durable finish. Choose a primer suitable for your furniture material and apply it evenly using a brush or roller. Allow the primer to dry completely according to the manufacturer’s instructions. Sand the primed surface lightly with fine-grit sandpaper to smooth out any imperfections.
6. Painting
Now comes the fun part – painting! Select a high-quality paint suitable for your furniture material and desired finish (matte, satin, or glossy). Apply thin, even coats of paint using a brush or sprayer, following the direction of the grain or surface texture. Allow each coat to dry completely before applying the next one. For best results, aim for at least two coats of paint, or more if needed for full coverage.
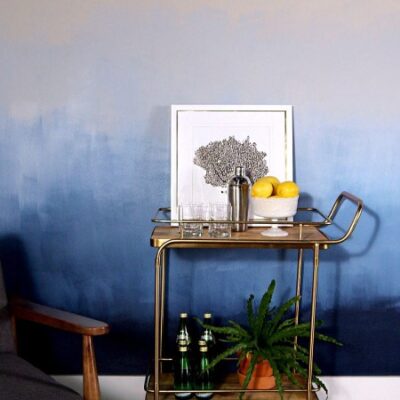
7. Finishing Touches
Once the final coat of paint has dried, consider adding decorative elements or finishes to enhance the piece’s visual appeal. You can distress the edges for a vintage look, apply stencils or decals for added flair, or even experiment with different paint colors or techniques like ombre or faux finishes. Seal the paint with a clear coat or furniture wax to protect the surface and ensure longevity.
8. Reassembly and Placement
After allowing sufficient time for the paint to cure, reassemble the furniture if necessary and place it in its designated spot. Admire your handiwork and enjoy the satisfaction of transforming an old piece into a beautiful focal point that adds character and style to your home.
Conclusion: Repainting old furniture is a rewarding DIY project that allows you to unleash your creativity while preserving cherished pieces with sentimental value. By following these steps and investing time and effort into proper preparation and execution, you can breathe new life into old furniture, creating stunning transformations that elevate the aesthetic appeal of any space. So, roll up your sleeves, gather your supplies, and embark on a journey of revival and reinvention with repainted furniture as your canvas!