What is brick washing with lime and how to do it limewash brick
Welcome to this guide on how to limewash brick! Limewashing is a traditional technique used for centuries to give bricks a beautiful, aged appearance while still allowing the natural texture and color of the brick to show through. In this section, we will go over the basics of limewashing and why it has become popular in both historic restoration projects and contemporary design.
Limewashing not only adds character and charm to bricks but also protects them from weathering, UV damage, and fading. It is an eco-friendly alternative to synthetic paint as it allows the bricks to breathe, preventing moisture buildup that can lead to deterioration.
In the following sections, we will explore various aspects of the limewashing process – from preparing your surface and choosing the right materials to applying the limewash mixture effectively. Let’s dive in!
Introduce the concept of limewashing brick and its benefits
Limewashing is a traditional technique used to give bricks a beautiful, aged appearance while still allowing their natural texture and color to shine through. It involves applying a mixture of lime, water, and pigments onto the surface of the brick.
One of the significant benefits of limewashing is its ability to protect brick from weathering, UV damage, and fading. Unlike synthetic paint, limewash allows the bricks to breathe, preventing moisture buildup that can lead to deterioration over time.
In addition to its protective qualities, limewash also adds character and charm to bricks. It can transform both old and new structures by giving them an authentic look with a soft patina that develops over time.
Moreover, limewashing is an eco-friendly alternative as it utilizes natural materials like lime rather than harsh chemicals present in conventional paints. This makes it a popular choice for historic restoration projects as well as contemporary design settings seeking a unique aesthetic appeal.
Preparation
Before you start the limewashing process, it’s essential to properly prepare the brick surface for optimal results. This section will guide you through the necessary preparations.
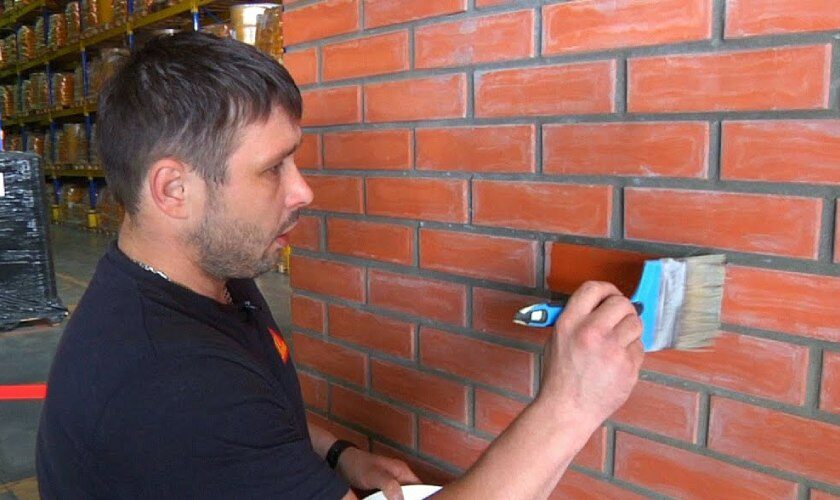
- Clean the surface: Begin by thoroughly cleaning the brick surface with a wire brush and water to remove any dirt, grime, or loose debris. It’s important to have a clean base for the limewash to adhere effectively.
- Repair any damages: Inspect the bricks for any cracks or damaged areas that need repairs. Use a suitable filler or mortar mix to fix these issues before proceeding.
- Test an inconspicuous area: Before applying limewash to the entire surface, it’s recommended to test its compatibility and desired effect on a small, hidden section of your brick wall. This will allow you to make adjustments if needed and ensure you achieve your desired result.
- Tape off adjacent surfaces:To prevent unnecessary mess, protect adjacent surfaces such as windowsills or trim by using painter’s tape or plastic sheeting.
Once you have completed these preparation steps, you are now ready to move on to mixing and applying the limewash in subsequent sections.
Discuss the necessary steps to prepare the brick surface for limewashing.
Preparing the brick surface properly is crucial for ensuring a successful and long-lasting limewash application. Here are the key steps to follow:
- Clean the surface: Start by thoroughly cleaning the brick surface using a wire brush and water. Remove any dirt, dust, or loose debris that may hinder adhesion.
- Inspect for damages: Carefully examine the bricks for any cracks, holes, or damaged areas. Fill in these imperfections using an appropriate filler or mortar mix. Allow sufficient drying time as per product instructions.
- Treat mold or mildew: If you notice any signs of mold or mildew on your brick wall, address this issue before applying limewash. Use a specific cleaner designed to remove mold and mildew, following its instructions carefully.
- Rinse thoroughly: After addressing any repairs and mold/mildew treatment, rinse off the cleaned areas with clean water to remove all residues from cleaning products.
- Test compatibility: Before proceeding with full-scale limewashing, perform a small test on an inconspicuous area of your brick wall. This will allow you to assess how well the limewash adheres and achieves your desired aesthetic effect.
Taking these preparatory steps ensures that your brick surface is clean, repaired, and ready to receive the limewash mixture effectively. With proper preparation in place, you can now move forward confidently with applying limewash onto your bricks!
Curing and Maintenance
After completing the application of limewash on your brick surface, it is important to allow proper curing time for the lime to set and bond with the bricks. This section will guide you through the crucial steps of curing and maintaining your limewashed brick.
Curing:
- Keep the limewashed surface protected from any type of moisture for at least 7-10 days after application.
- Avoid touching or disturbing the surface during this curing period.
- Mist the limewash lightly with water once or twice daily during this timeframe – this helps in initial hydration and creating a strong bond between lime and brick.
Maintenance:
- To maintain your limewashed brick’s appearance, periodic cleaning may be necessary. Gently remove dirt or dust buildup using a soft bristle brush or rinse with low water pressure.
- Inspect periodically for any signs of damage or wear on specific areas. Touch up these areas with additional layers of limewash as needed, following the same application process.
- If you notice any stains that do not come off with regular cleaning methods, consult a professional for appropriate stain removal techniques without damaging the underlying lime layer.
By following these curing and maintenance practices, you can ensure that your limewashed bricks retain their beauty and durability over time while enjoying their unique aesthetic appeal!
Understanding the Importance of Exterior PaintThe importance of exterior paint cannot be underestimated when it comes to maintaining and enhancing the appearance of your home. Not only does a fresh coat of paint improve curb appeal, but it also acts as a protective barrier against harsh weather conditions and extends the lifespan of your exterior surfaces.
Exterior paint provides a shield against elements such as UV rays, rain, snow, and humidity, which can cause damage over time. It helps prevent rotting, warping, fading, and cracking to keep your home looking its best.
In addition to protection, exterior paint offers an opportunity to express your personal style and enhance the overall aesthetics of your property. Choosing the right color scheme can breathe new life into an older home or add character to a new one.
Proper surface preparation is crucial before applying exterior paint. Cleaning the surfaces thoroughly and making any necessary repairs will ensure a smooth and long-lasting finish.
Investing in quality exterior paint that is specifically formulated for outdoor use will result in better coverage, durability, and resistance to fading or peeling.
In conclusion, understanding the importance of exterior paint goes beyond mere aesthetics – it safeguards your investment by protecting your home’s structure from environmental factors while allowing you to showcase your personal style.
Enhancing Curb Appeal
One of the key benefits of using the best exterior paint is its ability to significantly enhance the curb appeal of your home. The external appearance of your property plays a crucial role in creating a positive first impression for visitors and potential buyers.
By choosing a color palette that complements the architectural style and surroundings, you can instantly transform the look and feel of your home’s exterior. A fresh coat of paint can make older homes look modern or breathe new life into faded exteriors.
Consider factors such as neighborhood trends, architectural guidelines, and personal preferences when selecting colors. Earthy tones are suitable for traditional homes, while vibrant shades can add a touch of energy to more contemporary designs.
Using contrasting colors on trim, doors, and shutters can create visual interest and highlight architectural features. Additionally, applying multiple coats or opting for specialty finishes like textured paint or faux effects can further enhance curb appeal.
Regularly maintaining your exterior paint by touching up any chips or fading will help preserve that desirable curb appeal over time. Remember to consider factors like natural lighting conditions during different times of day when making color choices as this could impact how certain shades appear outdoors.
In short, investing in high-quality exterior paint with careful consideration to color selection will undoubtedly improve your home’s curb appeal, leaving a lasting impression on anyone who passes by.
Protecting the Exterior Surface
One of the primary functions of the best exterior paint is to create a protective barrier against various environmental elements, ensuring the longevity and durability of your home’s exterior surfaces.
Exterior paint acts as a shield, safeguarding your property from damaging effects such as UV rays, moisture, mold, mildew, and extreme weather conditions. These factors can cause gradual deterioration and structural damage if left unprotected.
The right type of exterior paint will have properties that resist fading caused by sun exposure and maintain its color vibrancy over time. It should also be able to withstand temperature fluctuations without cracking or peeling.
In addition to protecting against physical damage, certain types of exterior paints contain additives that help prevent rotting or warping in wooden surfaces. This is especially important for areas exposed to high humidity levels or heavy rainfall.
A well-maintained outer coating not only increases the lifespan of your siding but also reduces the need for expensive repairs and replacements down the line. Regularly inspecting painted surfaces allows you to identify any issues early on and address them promptly.
By investing in top-quality exterior paint products specifically designed for outdoor use, you can ensure maximum protection for your home’s external surfaces while minimizing potential maintenance costs in the long run.
Tips for Proper Exterior Paint Application
Lasting and professional-looking results when applying exterior paint are achieved through proper preparation and application techniques. Follow these tips to ensure the best outcome:
- Clean and prep: Begin by thoroughly cleaning the surfaces you plan to paint. Use a pressure washer or scrub with mild soap and water to remove dirt, grime, and any loose or flaking paint. Repair any damaged areas and allow them to fully dry before painting.
- Prime if necessary: If you’re painting over bare wood or significantly altering colors, applying a primer can enhance adhesion and provide a uniform base for better coverage.
- Choose high-quality paint: Invest in the best exterior paint available within your budget. High-quality paints offer better performance, durability, color retention, and resistance against environmental elements.
- Select appropriate tools: Use high-quality brushes, rollers, or sprayers tailored for exterior applications. The right tools will help you achieve smooth and even coverage.
- Mind weather conditions: Check the weather forecast before starting your project. Avoid painting in extreme heat, humidity, wind, or rain as they can affect drying time and overall finish quality.
- Follow proper technique: Apply thin coats of paint using even strokes in one direction for consistent coverage. Allow each coat to dry completely before adding subsequent layers.
Related Posts
Navigating the Grain: A Guide to Choosing the Right Sandpaper Grit

Unleash Your Creativity: Innovative Techniques for Interior Painting
How to Repaint a Room: A Step-by-Step Guide

Choosing the Best Brands of Interior Paint

The art and science of indoor painting: a comprehensive guide

Mastering the art of painting: a step by step guide to using a paint roller

Painted living room ideas: transforming spaces with color

A Guide to Matching Paint Colors Already on Your Wall

Choosing the Perfect Painting Colors for Bedroom: A Comprehensive Guide